Bunny basket sewing for Easter
Tutorial and ideas to make everything about sewing, crochet, knit, embroidery, make handmade, make craft, folding paper, crafts, handicraft, tatting, knoting, origami, kirigami,recycling, scrapbooking, clay, toy,home decor, gardening ...
Hiển thị các bài đăng có nhãn Holiday crafts. Hiển thị tất cả bài đăng
Hiển thị các bài đăng có nhãn Holiday crafts. Hiển thị tất cả bài đăng
Thứ Hai, 11 tháng 4, 2011
Easy rabbit basket to make
Bunny basket sewing for Easter
Nhãn:
Gifts,
Holiday crafts,
Sewing,
Toys
Thứ Hai, 28 tháng 3, 2011
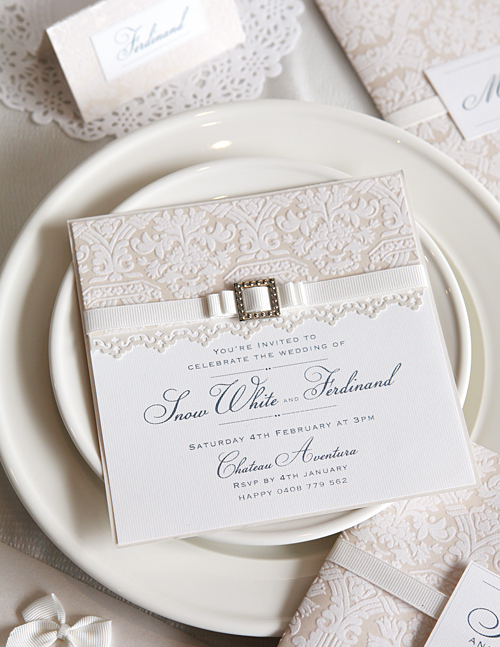
Making cards: Majestic Pearl Wedding Invitation
 |
Nhãn:
cards,
Holiday crafts,
Making Flowers,
Tutorial
Thứ Bảy, 26 tháng 3, 2011
Holiday crafts: making Christmas tree

Holiday crafts: Christmas tree
Nhãn:
Gifts,
Holiday crafts,
Making Flowers,
Tutorial
Thứ Ba, 15 tháng 3, 2011
Gifts with pompom
Nhãn:
Accessories,
Flowers,
Gifts,
Holiday crafts,
Toys,
Tutorial,
Wool
Making clothe for bottles

Recycling work
Nhãn:
Gifts,
Holiday crafts,
Recycling,
Tutorial
How to make string of lights advent calendar pattern
Here it is, the string of lights advent calendar tutorial (and pattern!). I made the pdf pattern file all by myself for the first time, so if you have problems with it just email me and I’ll try to fix it. Otherwise, hurry up! because advent is almost over!
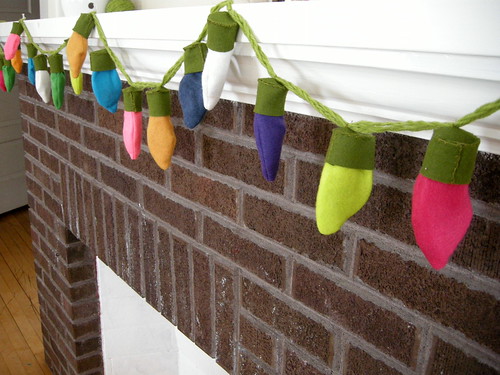
materials
green wool felt
multi-color felt scraps
60 feet green yarn
green embroidery thread
lightweight treats (gum balls, dum dums, love notes, tiny ornaments)
multi-color felt scraps
60 feet green yarn
green embroidery thread
lightweight treats (gum balls, dum dums, love notes, tiny ornaments)
Nhãn:
garlands,
Holiday crafts,
Home decoring,
Making Flowers,
Sewing,
Tutorial
Twisted Felt Garland, Necklace, and Bracelet

The holidays are such a great time to do craft projects. With the weather getting colder and family and friends all around it's the perfect time to settle in and do something creative. The only problem is that with all the parties, cooking, and traveling it's sometimes hard to find the time to indulge in the crafty aspects of the holidays.

This project is the perfect antidote to the holiday time crunch. It's quick and easy and requires very little sewing. Best of all, using one simple technique, you can make a garland for holiday decorations as well as cute necklaces and bracelets for stocking stuffers!

These garlands, necklaces, and bracelets, are made from our gorgeous 100% wool felt. Felt is the perfect material for quick but stunning projects like this because it's so easy to work with and comes in the most vibrant saturated colors. The technique used is super simple, just cutting some evenly spaced cuts along long strips of felt and then pulling the ends through these cuts. It comes together to look so festive and fun, especially in candy cane inspired colors like these. The garland will add a bright, modern, holiday touch to any mantle or tree and I can imagine giving the necklaces and bracelets out as party favors at a holiday party to get all the guests looking festive.

In different colors this same technique could be used for all of the holidays around this time of year, in blues and whites they would make lovely Hanukkah decorations, and in black and white they would be a bold new years statement!
Happy Holidays! --Molly
Materials

To make one 6-yard long garland, and several bracelets and/or necklaces:
- 1/4 yard of Wool Felt by the yard in ecru or white (I will refer to this as white in the pattern)
- 1/4 yard of Wool Felt by the yard in a bright contrasting color (I used tomato, magenta, pink, and red)
- 100% cotton thread in color 1140
- Sew on Snaps (for the bracelets only)
Cutting the Strips
 Using a rotary cutter, cut both colors of felt into 1-inch strips length-wise. You will have nine 1-inch by 72-inch strips. Try to do this carefully. There isn't much to this project so it's important that each step is done as neatly as possible.
Bracelet

Start out by making a bracelet, since it's the shortest and easiest piece and you won't waste too much felt if you make a mistake.
Cut a white and a colored strip to be 10-inches long and lay them down on top of each other so they match up exactly. Pin one of the short ends to keep them in place.

Starting 1-inch from the pinned end use your rotary cutter to make a 2-inch slice lengthwise across the middle of the strip (a 1/2-inch from either long side).

Then make two more 2-inch slices, each 1-inch from the previous cut. Your bracelet will now be a 10-inch strip with three 2-inch slits cut down the middle, each 1-inch apart.

Now it's time to start twisting! Take out the pin at the end of the strips. They should stay together alright without it. With the white felt facing up fold one of the ends into the nearest slit as shown above.

Pull the end through taught so that it forms a pretty "V" shape of the contrasting felt.

Now pull the end through the second slit in the same direction to form your next little "V".
Repeat this for the last slit.

Trim the ends of your bracelet so the felt strips are matching up (they will get slightly out of alignment because of the twisting.)
Hand sew the snaps onto each each end.
Garland and Necklaces
The garland and necklaces are put together using the exact same technique as the bracelets only on a longer scale. There are only a few differences to keep in mind:
- When cutting the slices into a longer strip only cut five slits at a time, twist them as instructed in the bracelet instructions and then cut then next five slits.
- Be sure to always fold the end through the slits in the exact same direction, with the white felt facing up and turning through the next slit in succession.
- You will have to trim the ends a little more when you're done twisting the strips because the longer the strips are in the beginning the more offset they will get by the end.

To make to a garland you will twist three separate 72-inch long strips, Strip A, B, and C, across their entire length.
Trim the ends of each strip to be a 1/2-inch from the first and last slits.

Then pin the top white strip to the bottom colored strip at the beginning and end of each strip to keep them in place. Place Strip A's end flush against Strip B's start. Make sure the "Vs" are going in the same direction.
Zig Zag stitch Strip A to Strip B together where they meet.
Repeat this to attach Strip B to Strip C and you're all done! The garland will be approximately 6-yards long.

For the Necklace:
Start with a 1-inch by 36-inch strip and cut and twist it just like the garland.
Trim the ends to be 1/2-inch and zig zag stitch the beginning to the end, being careful not to twist it, in the same manner as the garland.
Happy Holiday Crafting
How to straw and pompom garland
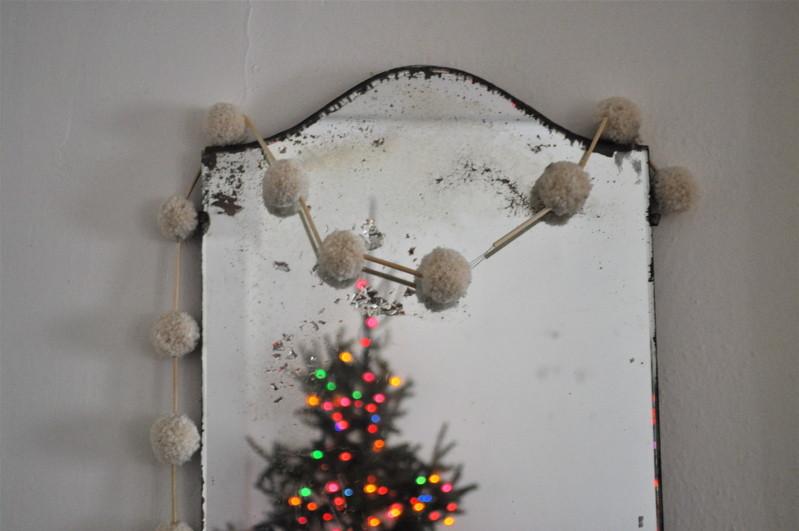
a straw and pompom garland
I ordered a bunch of natural straws from the lovely online shop, Imagination Childhood (they call them swedish straws). I bought them for another project (thursday’s tutorial!), but I loved working with them so much I wanted to make a simple garland with them too. Obviously this can be done with plastic straws or even some pretty paper straws, if you don’t have any swedish straws lying around. But the natural straws are, well, natural and because of the they are curved slightly and the colors are mottled and the surface uneven, all of which makes them pretty beautiful.
Thứ Hai, 14 tháng 2, 2011
Pom Pom Valentine Wreath Tutorial
Nhãn:
Holiday crafts,
Toys,
Tutorial,
Valentine's day,
Wool,
Wreath
Fall Fabric Pumpkin Tutorial

Fall Fabric Pumpkin Tutorial
Supplies:
Fabric pieces - variety of sizes
2 pieces of brown felt
1 piece tan felt
Fiberfill or other stuffing material
Brown embroidery floss
Thick twine
Hand-sewing needle
Sewing Machine
Decorative wire berries (optional)
Nhãn:
Holiday crafts,
Patchwork,
Toys,
Tutorial
Thứ Tư, 9 tháng 2, 2011
Make a Chinese Lantern from paper or card
My children made these for Chinese New Year at school and they loved making them so much we had them hanging in the house for weeks afterwards. They also make great decorations for parties held in the house or the garden.
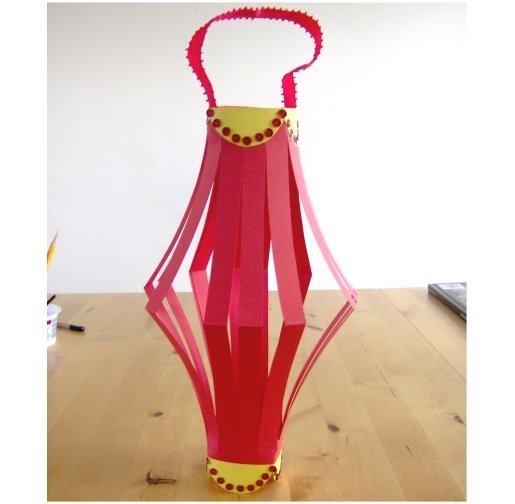
Make a Chinese Lantern from paper or card.
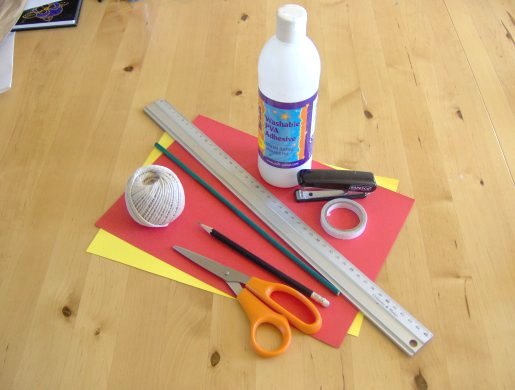
You will need:
Coloured card ( A4 is a good size for this but you can make them any size you want)
Ribbon/ string or a length of card aprox 2cm x 30cm (length of A4 card for the handle in the same coloured card as the lantern or a colour to match the decorations)
Pencil
Ruler
Scissors
PVA glue, double sided sticky-tape or staples
Extra card, glitter, sequins etc for decoration
String/thread
Garden cane/bamboo
how to make a fabric windsock garden lantern
Hung from a tree or a wrought iron plant hanger, this fairly simple project will make a charmingly mod windsock garden lantern. During the day, it will add interest & texture. At night, it gives off a soft, ambient light that glows like a firefly - a nice touch for a summer evening lazing outside.
Notes:
+ "Windsock" is used to refer to the shape & basic idea, not the application. I wouldn't personally leave it outside blowing in the wind.
+ All steps are explained but not all steps are shown. Please read the instructions carefully so you don't miss something. It looks long, but it's just like making a simple back-tab-top curtain + a drawstring bag in one.
+ I used a 3/8" seam allowance, except where noted.
+ The design shows 8 tabs, but there are really only 4 tabs! I didn't realize my misengineering ways until I was ready to thread the lights...so disregard those extra 4 if you see them!!!
Thứ Hai, 27 tháng 12, 2010
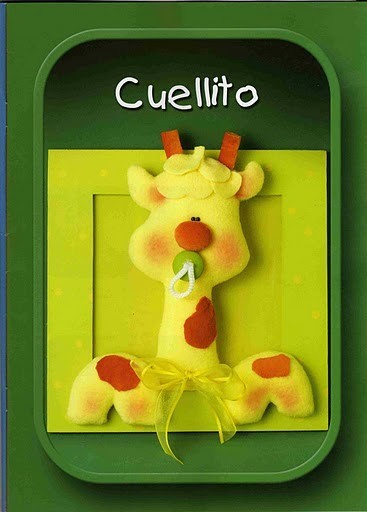
Make giraffe from felt
Nhãn:
Crafts,
Felt,
Holiday crafts,
Holidaycrafts,
Sewing,
Toys,
Tutorial
Chủ Nhật, 26 tháng 12, 2010
Pom pom maker

This is a tutorial for making pom-poms using your
fingers. This one is a small, two-finger pom-pom
(about 1" in diameter) but you can make bigger ones
by using more fingers. As far as yarn choice, thinner
and softer yarn will make a more pleasing pom-pom.
Nhãn:
Crafts,
Gifts,
Holiday crafts,
Making Flowers,
Toys,
Tutorial,
Wool
Đăng ký:
Bài đăng (Atom)


